■Assembly guide - mCB Christmas tree
Share
*The contents of this book are the same as the instruction manual that comes with your purchase.
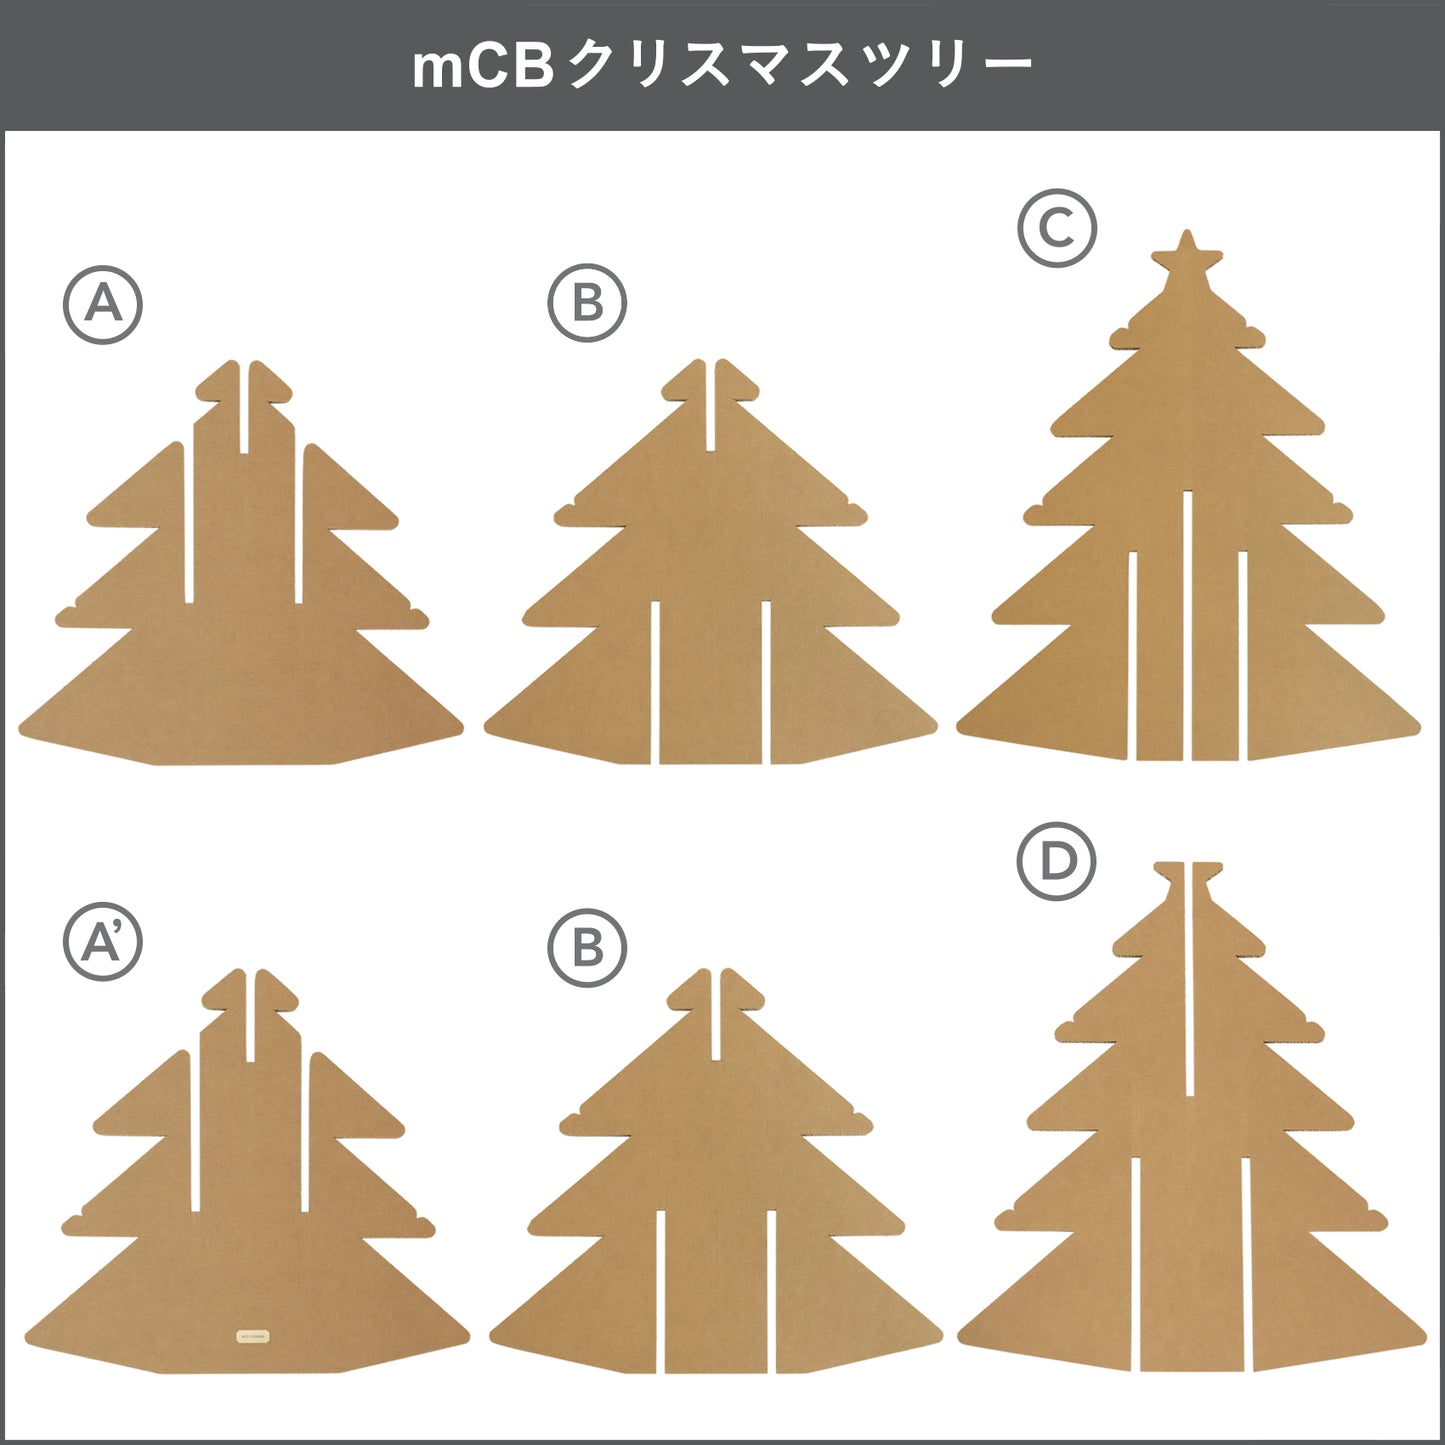
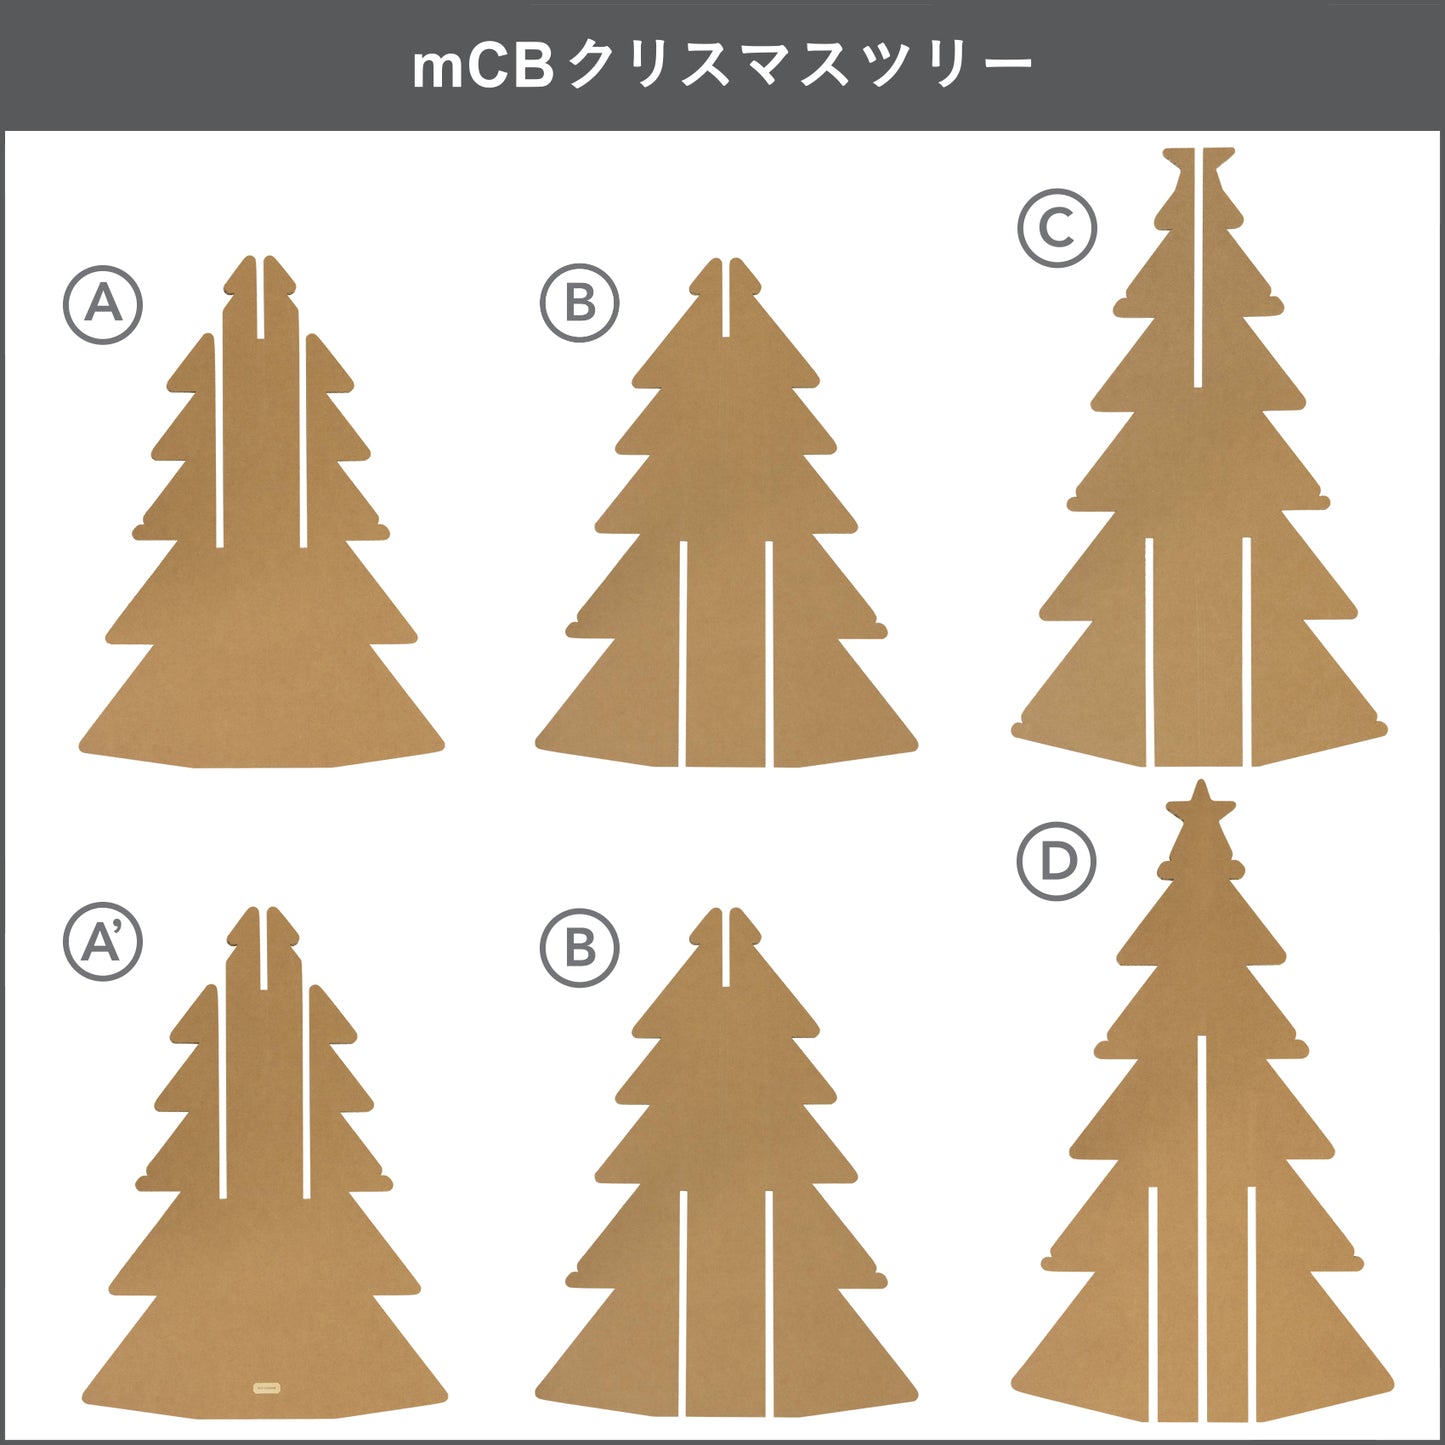
① Identify the parts
First make sure you have all the parts.
A/A': Small size (notch only on top) x 2
B: Small size (top and bottom notches) ×2
C: Large size (starred) ×1
D: Large size (top and bottom notches) ×1


② Assembling (shaft part)
Place the small size (notch on top only) [A] and the small size (notch on top only/with logo mark) [A'] in parallel. At this time, please stand it up so that the logo mark at the bottom of the [A'] leg is on the outside.
Insert the large size (top and bottom notches) [D] into the center notch of [A/A'] from above. Please insert it firmly from the bottom to the notch edge about 14cm.
*The bottom of [D] will not reach the installation surface and will stop halfway.

③ Assembling (bottom part)
Insert the two pieces of small size (top and bottom notches) [B] into the two notches at the back and front of the small size (top only notches) [A/A'] assembled in step ②. Make sure to firmly insert it all the way to the installation surface.

④ Assembling (final) & completion
Finally, insert the large size (starred) [C] and complete.
At this time, since you are inserting it into multiple parts, please insert it straight from the top. If the angle is different, you may not be able to insert it all the way.


